2、多颜色识别实验
About 4 min
例程代码
import sensor
import image
import time
import lcd

#初始化LCD
lcd.init()
#以下是初始化传感器
sensor.reset()
sensor.set_pixformat(sensor.RGB565)
sensor.set_framesize(sensor.QVGA)
sensor.skip_frames(time = 100)
sensor.set_auto_gain(False)
sensor.set_auto_whitebal(False)
#帧率时钟
clock = time.clock()

#方框参数
r = [(320//2)-(50//2), (240//2)-(50//2), 50, 50]

# 储存多种颜色的LAB阈值
color_thresholds = [
    (31, 69, 27, 58, 14, 36),# Red
    #(20,80,20,62,20,35),


    #(49, 74, -26, 48, 15, 55),# Green
    (14, 61, -39, -6, 0, 14),

    (14, 66, 1, 38, -56, -12),# Blue
    #(21,50,-7,8,-35,-11),

    (49, 77, -8, 52, 16, 60),# Yellow
    #(65, 78, -10, -5, 38, 50),
]

color_strings = ['Red', 'Green', 'Blue', 'Yellow']

print("Start Color Recognition...")

#loop
while True:
    #用于计算帧率的函数,这里表示开始计时
    clock.tick()
    #从传感器捕获一张图像
    img = sensor.snapshot()
    #遍历多种颜色
    for color_idx, threshold in enumerate(color_thresholds):
        #遍历图像中找到的颜色区块
        blobs = img.find_blobs([threshold], pixels_threshold=100, area_threshold=100, merge=True, margin=10)
        #是否找到
        if blobs:
            #画方框
            for blob in blobs:
                color_new = (255 , 255,255)
                if color_idx == 0 :
                    color_new = (255 , 0,0)
                elif color_idx == 1:
                    color_new = ( 0,255 ,0)
                elif color_idx == 2:
                    color_new = ( 0,0,255)
                elif color_idx == 3:
                    color_new = ( 255,255,0)
                img.draw_rectangle(blob.rect(), color=color_new,thickness = 3)
                img.draw_cross(blob.cx(), blob.cy(), color=color_new)
                img.draw_string(blob.cx() + 10, blob.cy() - 10, color_strings[color_idx], color=color_new)
    #显示在LCD上
    lcd.display(img)
    #打印帧率
    print(clock.fps())
实验准备
- 请先将模型文件导入TF卡上,再将TF卡插入到K210模块的TF卡插槽上。具体操作步骤请参考:传输模型文件到TF卡。
- 准备任意颜色较为鲜明的物品。
- 通过usb线将K210与电脑连接。
- 打开CanMV IDE,执行上面的例程代码。
实验结果
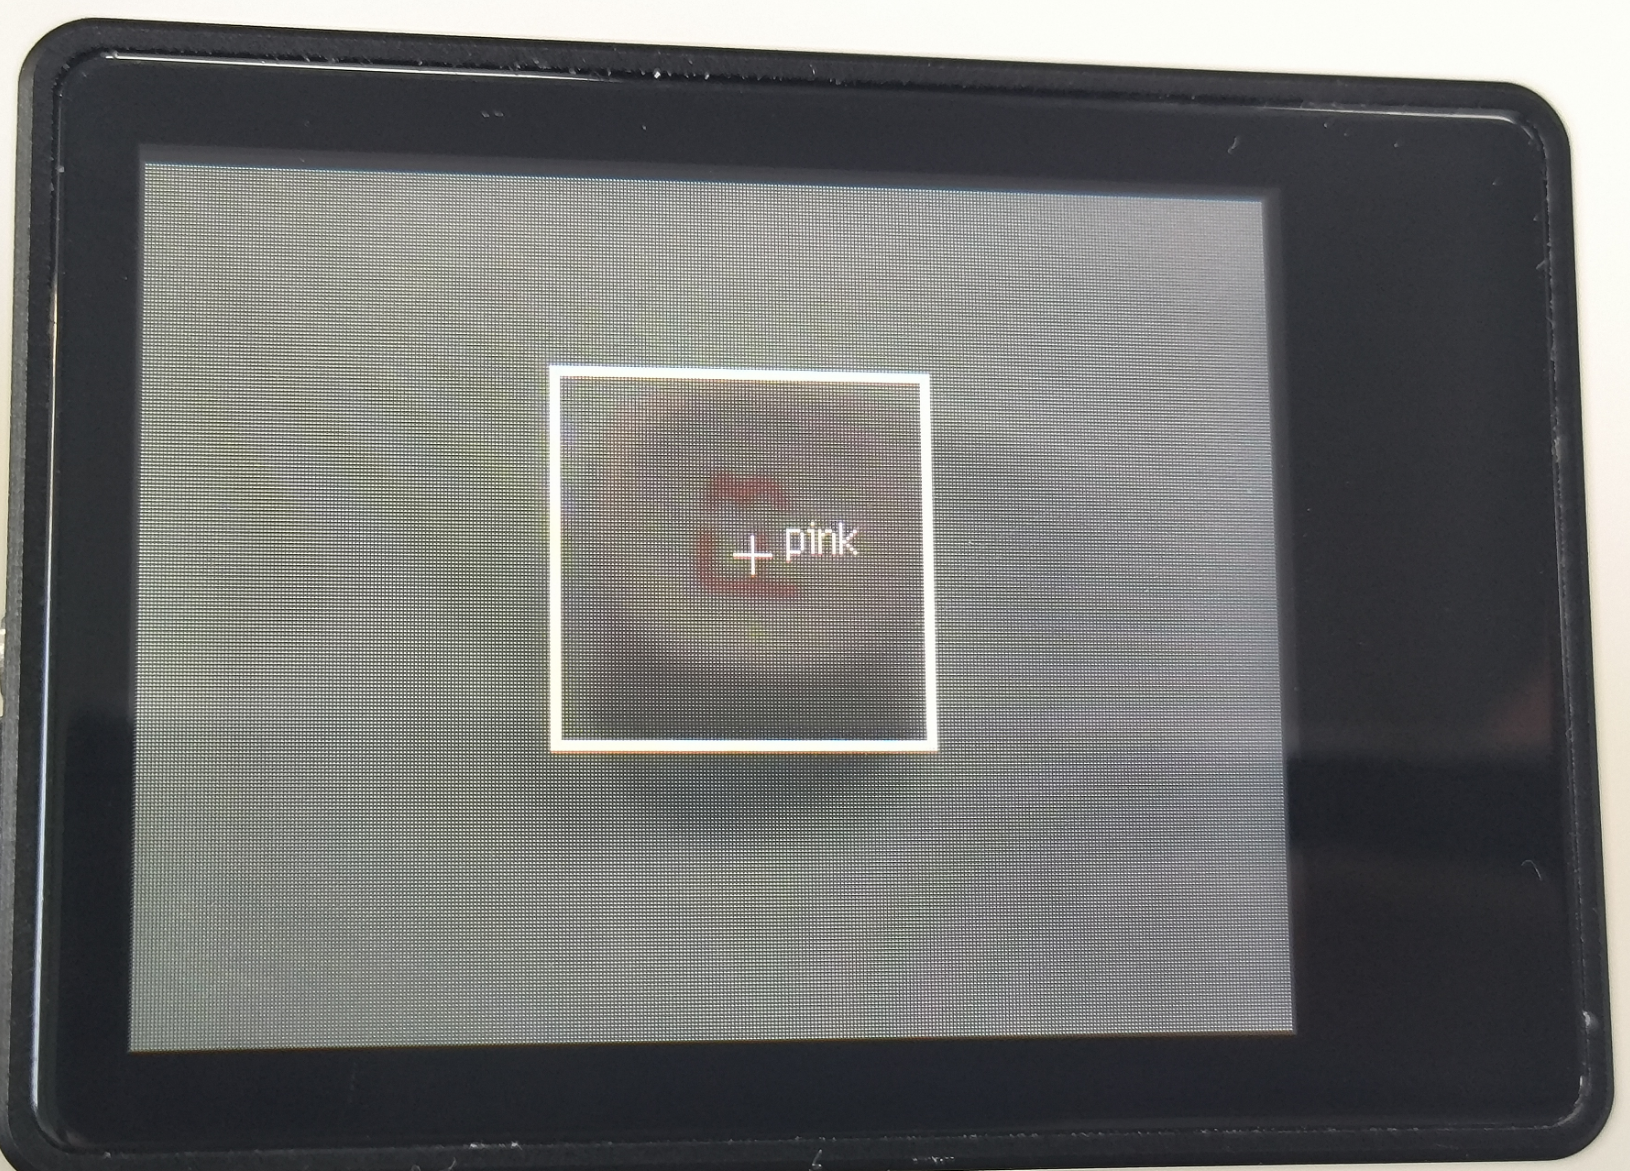
- 等待系统初始化完成后,LCD显示摄像头画面,并开始对画面进行识别,把识别到的颜色显示到屏幕上。
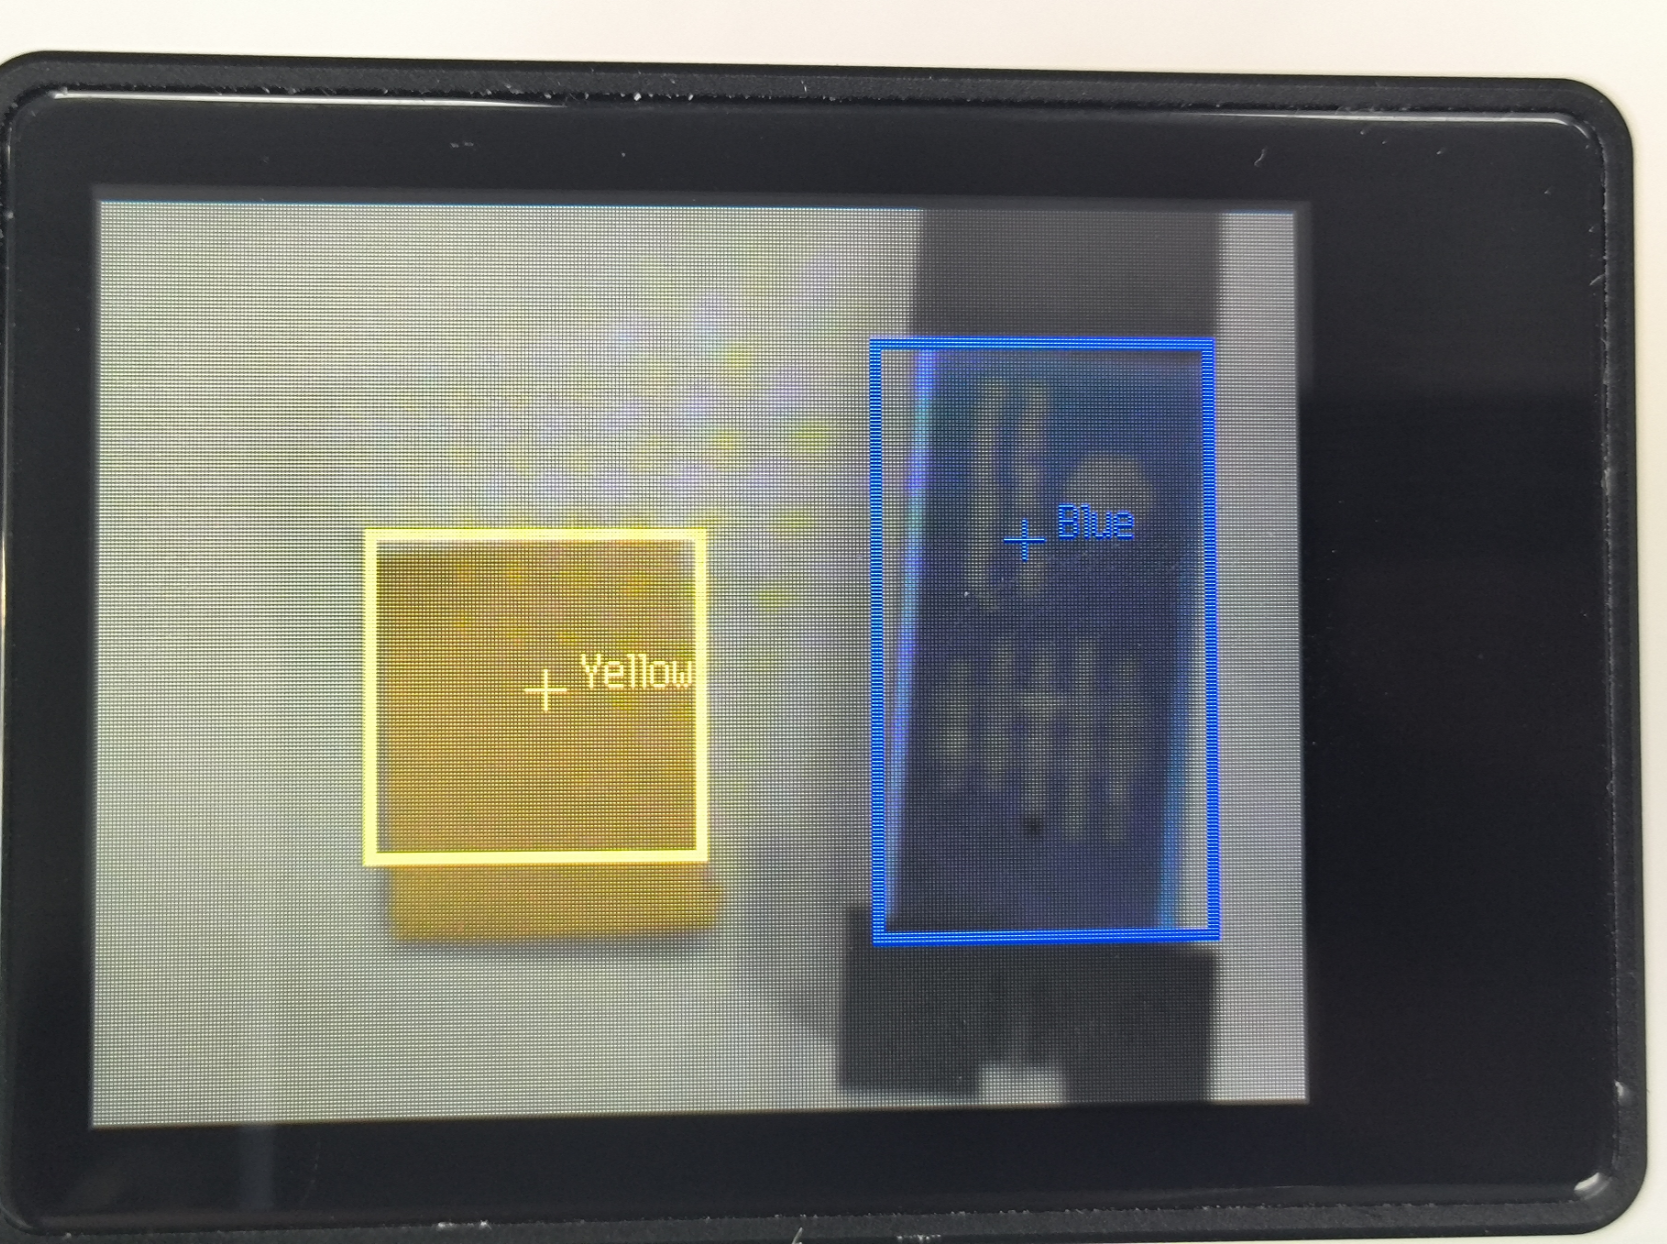
- 多种颜色识别的功能主要是分析颜色的LAB值,再与摄像头采集到的颜色的LAB值作为分析对比,如果符合要求则画出方框并标注对应的颜色,表示识别。该办法对识别出的颜色的环境光有比较大的影响,不同的环境光LAB的值会有所不同。
例程代码讲解
- 导入相关库,并初始化摄像头和LCD显示屏。
import sensor
import image
import time
import lcd
lcd.init()
sensor.reset()
sensor.set_pixformat(sensor.RGB565)
sensor.set_framesize(sensor.QVGA)
sensor.skip_frames(time = 100)
sensor.set_auto_gain(False)
sensor.set_auto_whitebal(False)
clock = time.clock()- 进行颜色lab值的阈值范围编写。
color_thresholds = [
    (31, 69, 27, 58, 14, 36),# Red
    #(20,80,20,62,20,35),


    #(49, 74, -26, 48, 15, 55),# Green
    (14, 61, -39, -6, 0, 14),

    (14, 66, 1, 38, -56, -12),# Blue
    #(21,50,-7,8,-35,-11),

    (49, 77, -8, 52, 16, 60),# Yellow
    #(65, 78, -10, -5, 38, 50),
]

color_strings = ['Red', 'Green', 'Blue', 'Yellow']- 新建一个while循环,对摄像头采集的画面进行颜色识别,并把识别的结果显示在屏幕上。
while True:
    #用于计算帧率的函数,这里表示开始计时
    clock.tick()
    #从传感器捕获一张图像
    img = sensor.snapshot()
    #遍历多种颜色
    for color_idx, threshold in enumerate(color_thresholds):
        #遍历图像中找到的颜色区块
        blobs = img.find_blobs([threshold], pixels_threshold=100, area_threshold=100, merge=True, margin=10)
        #是否找到
        if blobs:
            #画方框
            for blob in blobs:
                color_new = (255 , 255,255)
                if color_idx == 0 :
                    color_new = (255 , 0,0)
                elif color_idx == 1:
                    color_new = ( 0,255 ,0)
                elif color_idx == 2:
                    color_new = ( 0,0,255)
                elif color_idx == 3:
                    color_new = ( 255,255,0)
                img.draw_rectangle(blob.rect(), color=color_new,thickness = 3)
                img.draw_cross(blob.cx(), blob.cy(), color=color_new)
                img.draw_string(blob.cx() + 10, blob.cy() - 10, color_strings[color_idx], color=color_new)
    #显示在LCD上
    lcd.display(img)
    #打印帧率
    print(clock.fps())
DIY颜色
若需要获取新增颜色的 LAB 阈值,或者是根据环境光要修改的颜色LAB值。都可以通过 CanMV IDE 的工具获取。下面将讲解如何根据环境光,修改LAB的值,或者是添加除教程外的DIY颜色。
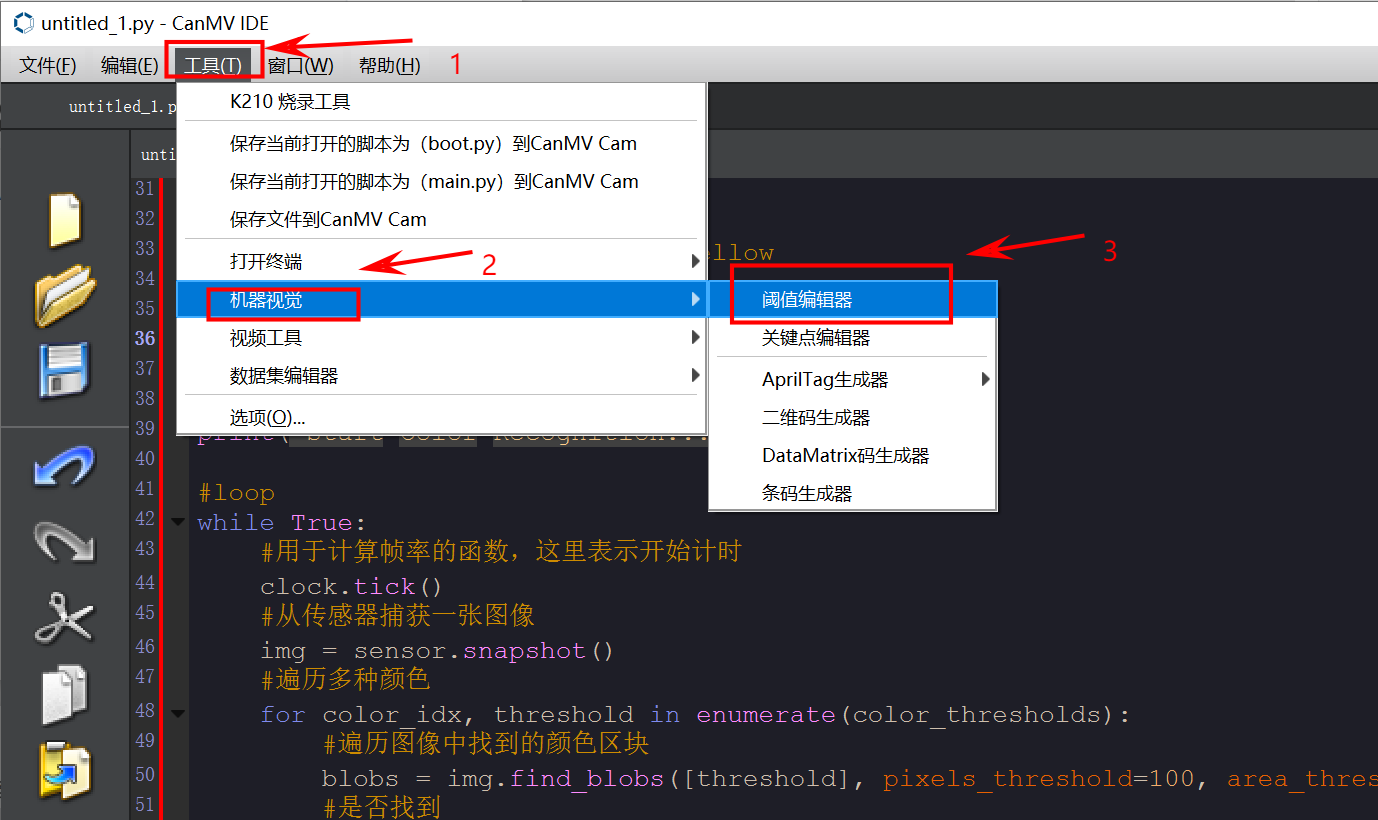
- 获取需要增加颜色的 LAB 阈值。双击 CanMV IDE 打开,点击“工具->机器视觉-> 阈值编辑器”选择阈值编辑器工具。
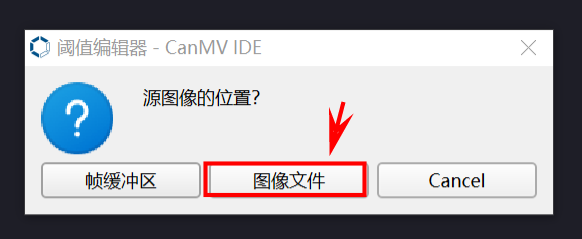
- 点击“图像文件”。
- 选择准备好含有需要新增颜色的图片,或者根据当前环境光要识别颜色的图片(尽量选择背景干净,没有其他颜色干扰的图片)。
- 拖动滑块直至识别颜色区域全为白色,其他区域全为黑色,记录得到的 LAB 阈值。
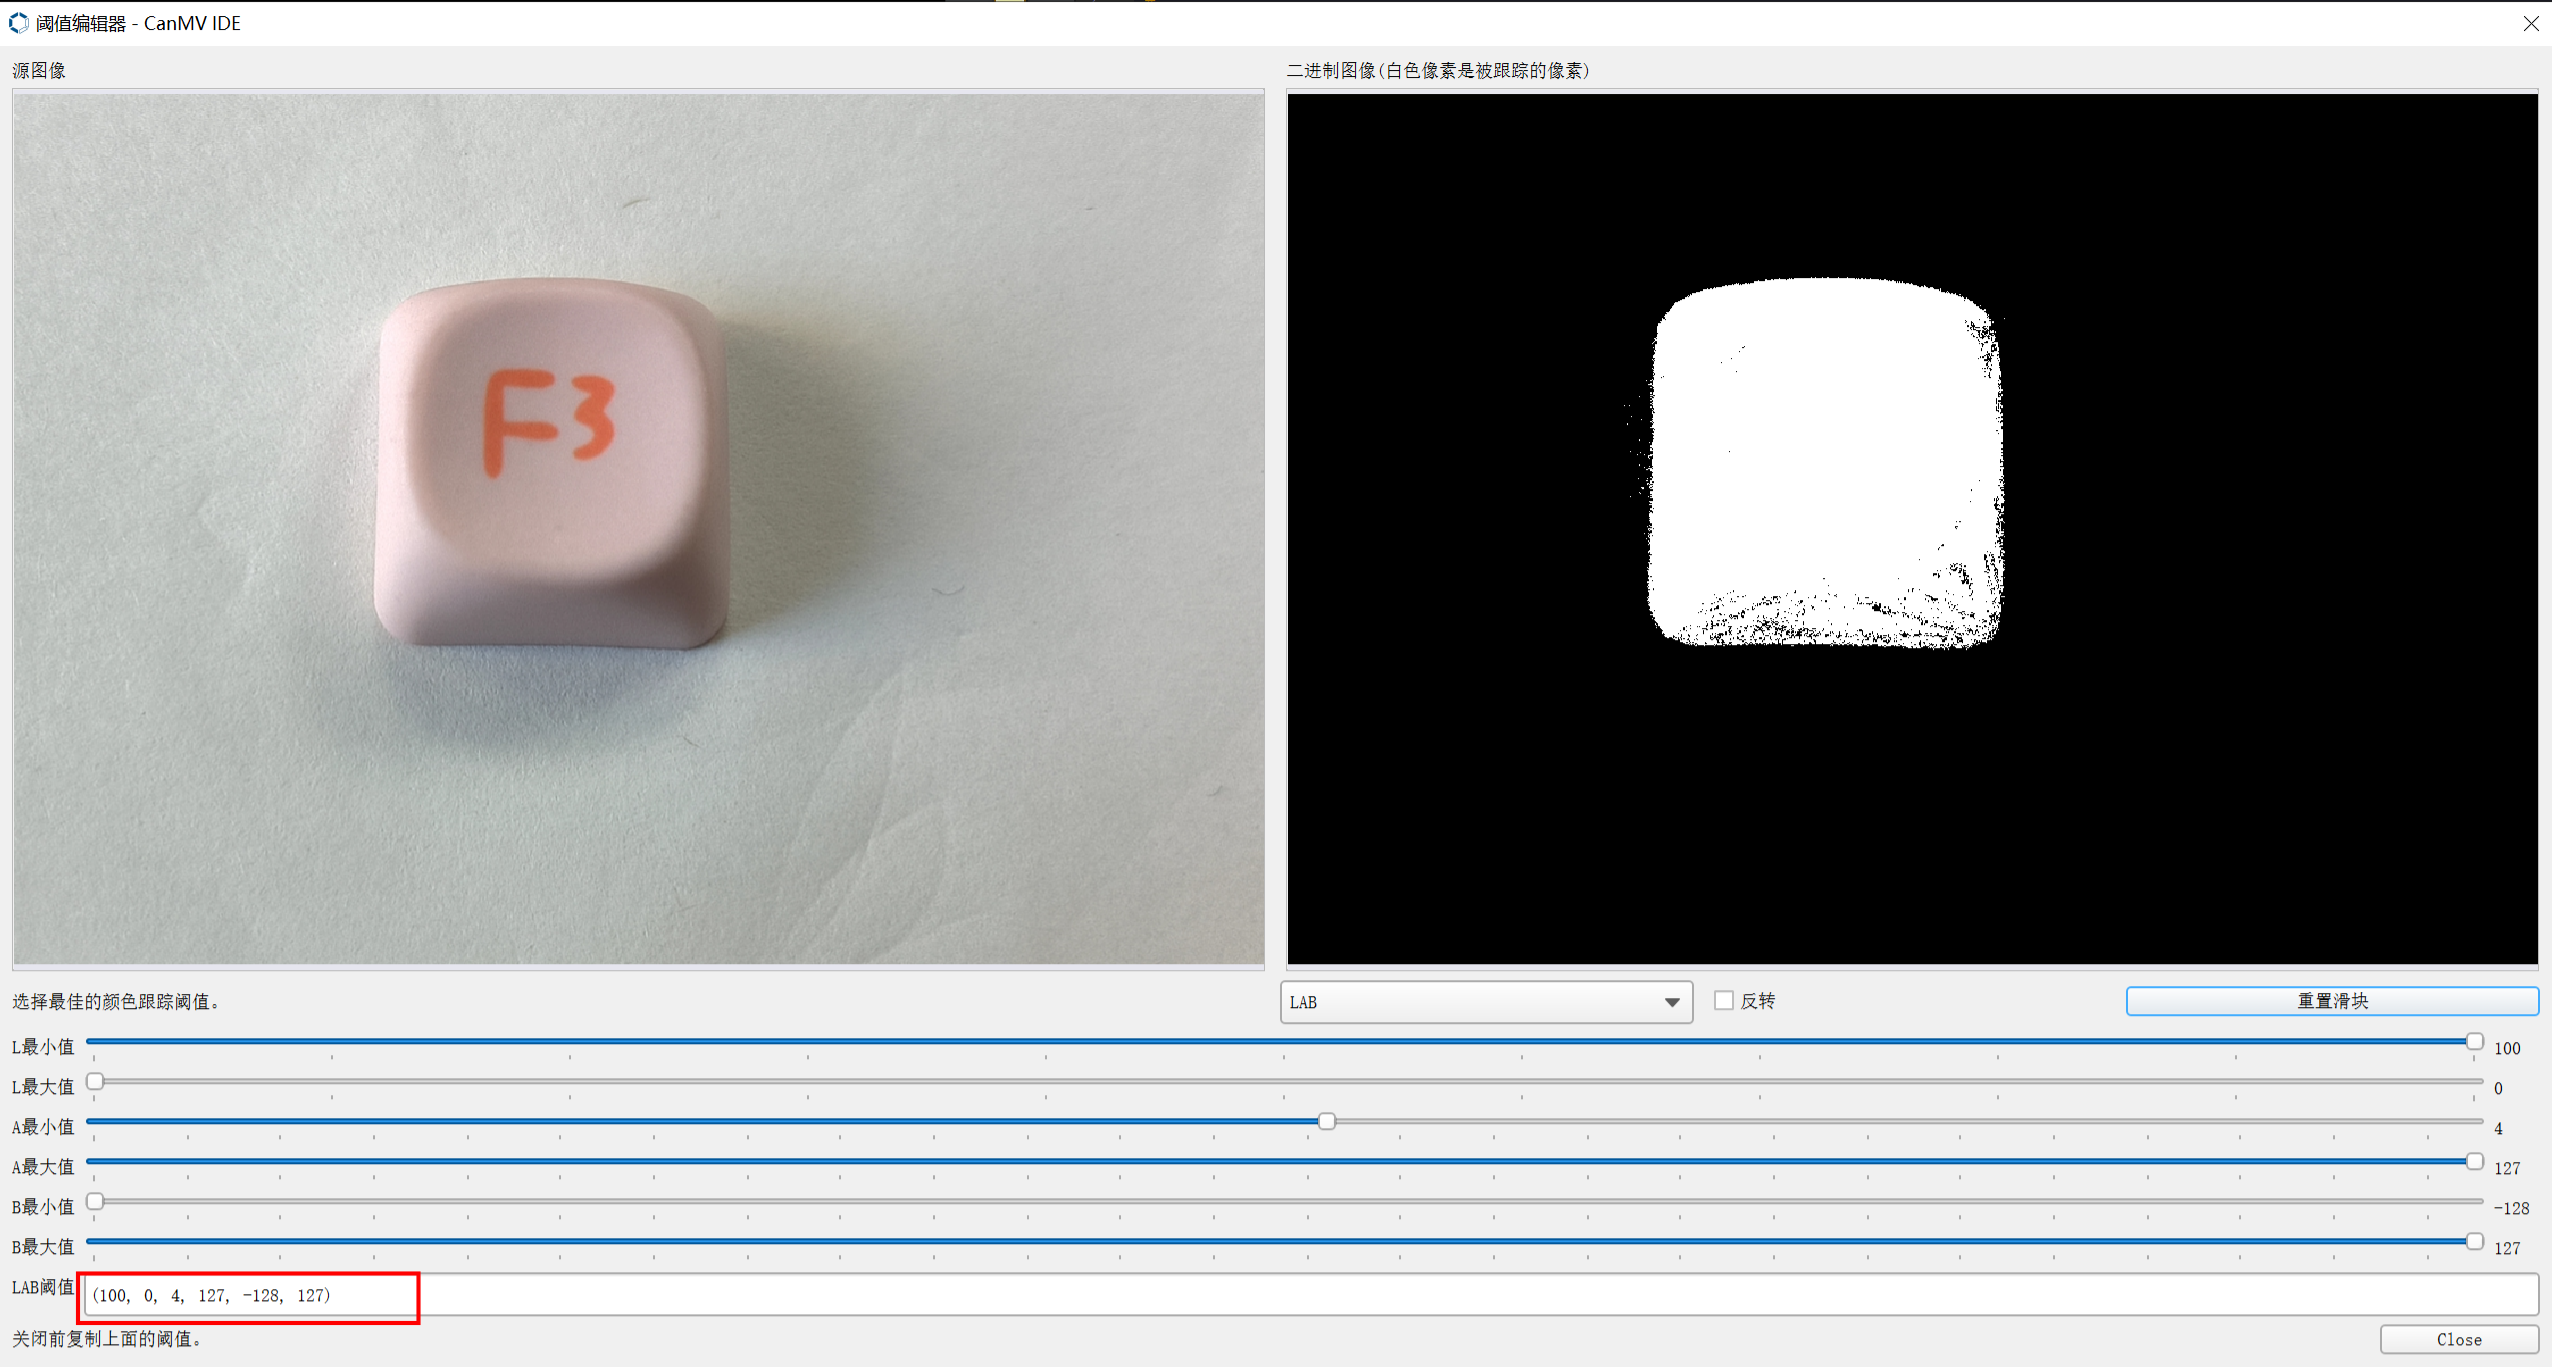
- 把得到的阈值放进源码当中,如下图所示。
color_thresholds = [
    (31, 69, 27, 58, 14, 36),# Red
    (14, 61, -39, -6, 0, 14),# Green
    (14, 66, 1, 38, -56, -12),# Blue
    (49, 77, -8, 52, 16, 60),# Yellow
    (需要增加的LAB的值)#DIY的LAB值 ,需自行修改
]
color_strings = ['Red', 'Green', 'Blue', 'Yellow','需要增加的自定义颜色'] #需自行修改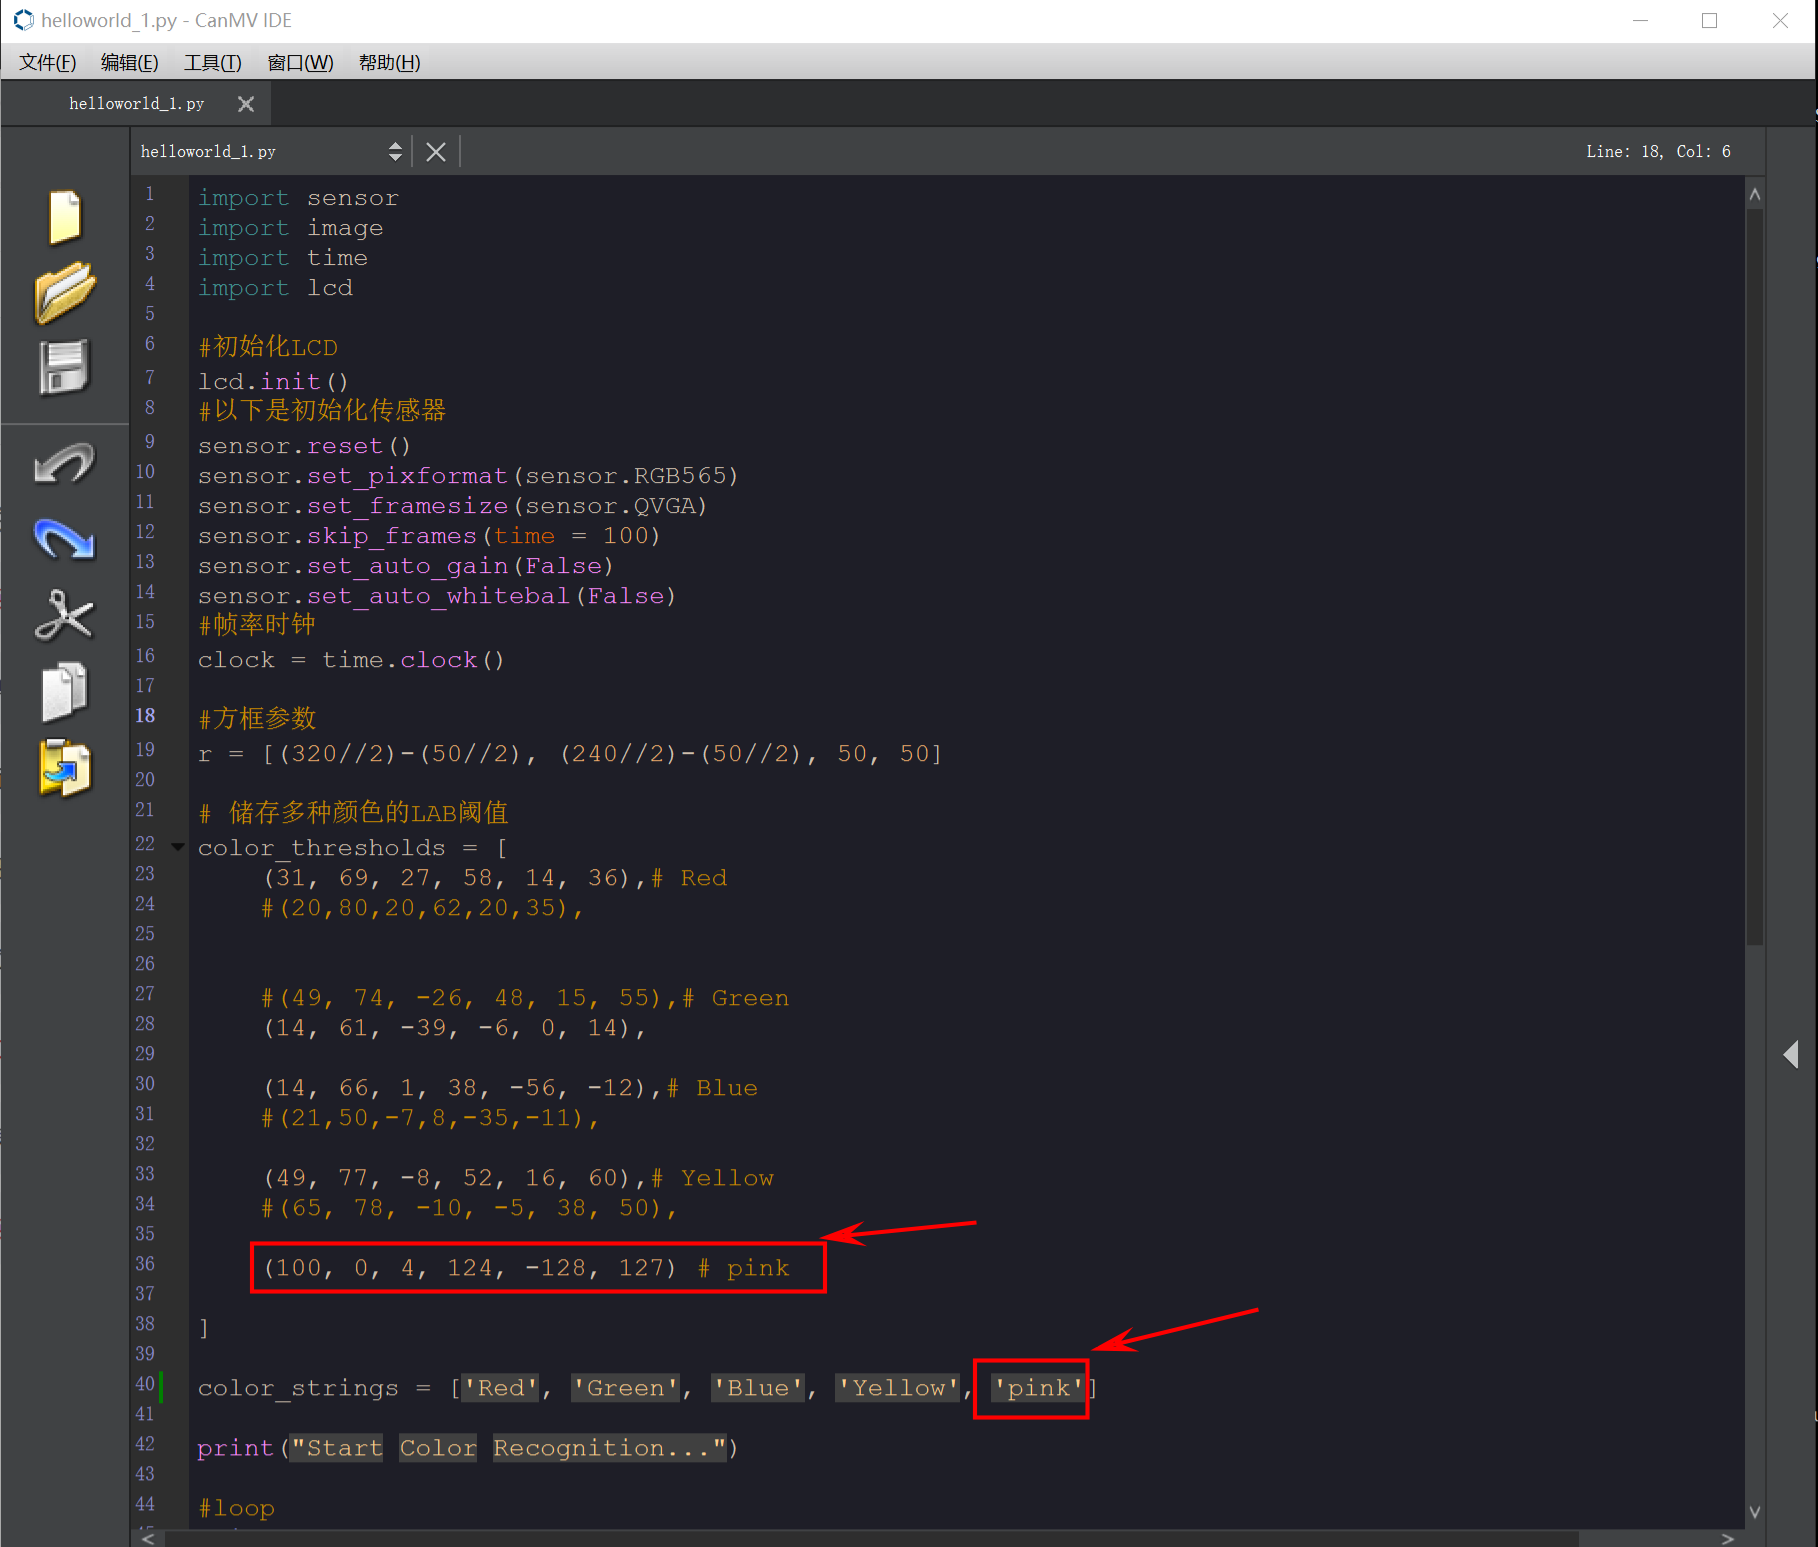
- 运行新的多颜色识别程序,可以看到,K210识别出来了新增加的颜色。