8、口罩识别实验
大约 3 分钟
例程代码
import sensor, image, time, lcd
from maix import KPU

lcd.init()
sensor.reset()
sensor.set_pixformat(sensor.RGB565)
sensor.set_framesize(sensor.QVGA)
sensor.skip_frames(time = 1000)
clock = time.clock()

od_img = image.Image(size=(320,256), copy_to_fb=False)

anchor = (0.156250, 0.222548, 0.361328, 0.489583, 0.781250, 0.983133, 1.621094, 1.964286, 3.574219, 3.94000)
kpu = KPU()
print("ready load model")
kpu.load_kmodel("/sd/KPU/face_mask_detect/detect_5.kmodel")
kpu.init_yolo2(anchor, anchor_num=5, img_w=320, img_h=240, net_w=320 , net_h=256 ,layer_w=10 ,layer_h=8, threshold=0.7, nms_value=0.4, classes=2)

while True:
    clock.tick()
    img = sensor.snapshot()
    od_img.draw_image(img, 0,0)
    od_img.pix_to_ai()
    kpu.run_with_output(od_img)
    dect = kpu.regionlayer_yolo2()
    fps = clock.fps()
    if len(dect) > 0:
        print("dect:", dect)
        for l in dect :
            if l[4] :
                img.draw_rectangle(l[0],l[1],l[2],l[3], color=(0, 255, 0))
                img.draw_string(l[0],l[1]-24, "with mask", color=(0, 255, 0), scale=2)
            else:
                img.draw_rectangle(l[0],l[1],l[2],l[3], color=(255, 0, 0))
                img.draw_string(l[0],l[1]-24, "without mask", color=(255, 0, 0), scale=2)

    img.draw_string(0, 0, "%2.1ffps" %(fps), color=(0, 60, 128), scale=2.0)
    lcd.display(img)

kpu.deinit()
实验准备
- 请先将模型文件导入TF卡上,再将TF卡插入到K210模块的TF卡插槽上。具体操作步骤请参考:传输模型文件到TF卡。
- 准备一张未戴口罩的人脸图片,一张戴有口罩的人脸图片。
- 通过usb线将K210与电脑连接。
- 打开CanMV IDE,执行上面的例程代码。
实验结果
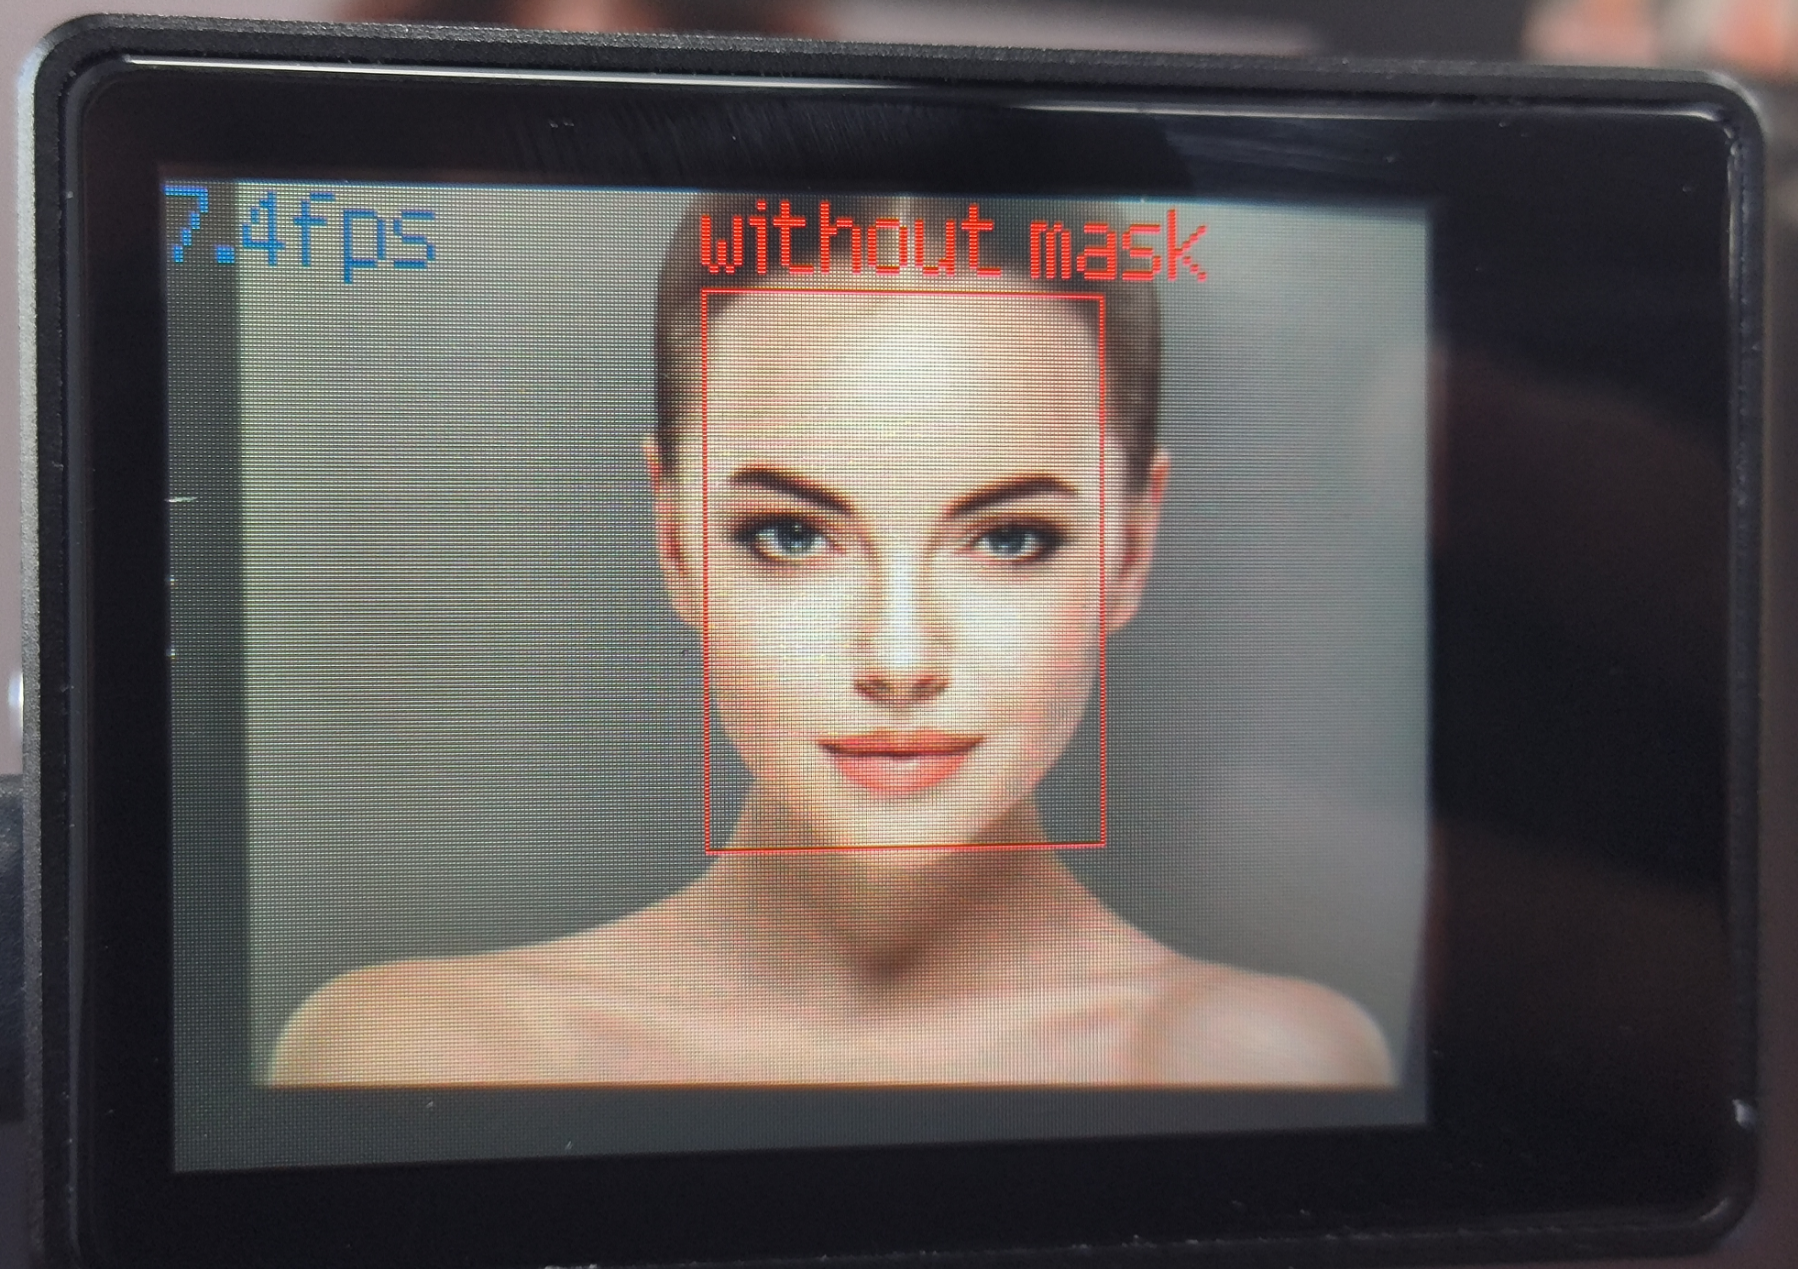
- 等待系统初始化完成后, LCD显示摄像头画面,用摄像头拍摄人脸,当未佩戴口罩时,显示红色框和"without mask"。
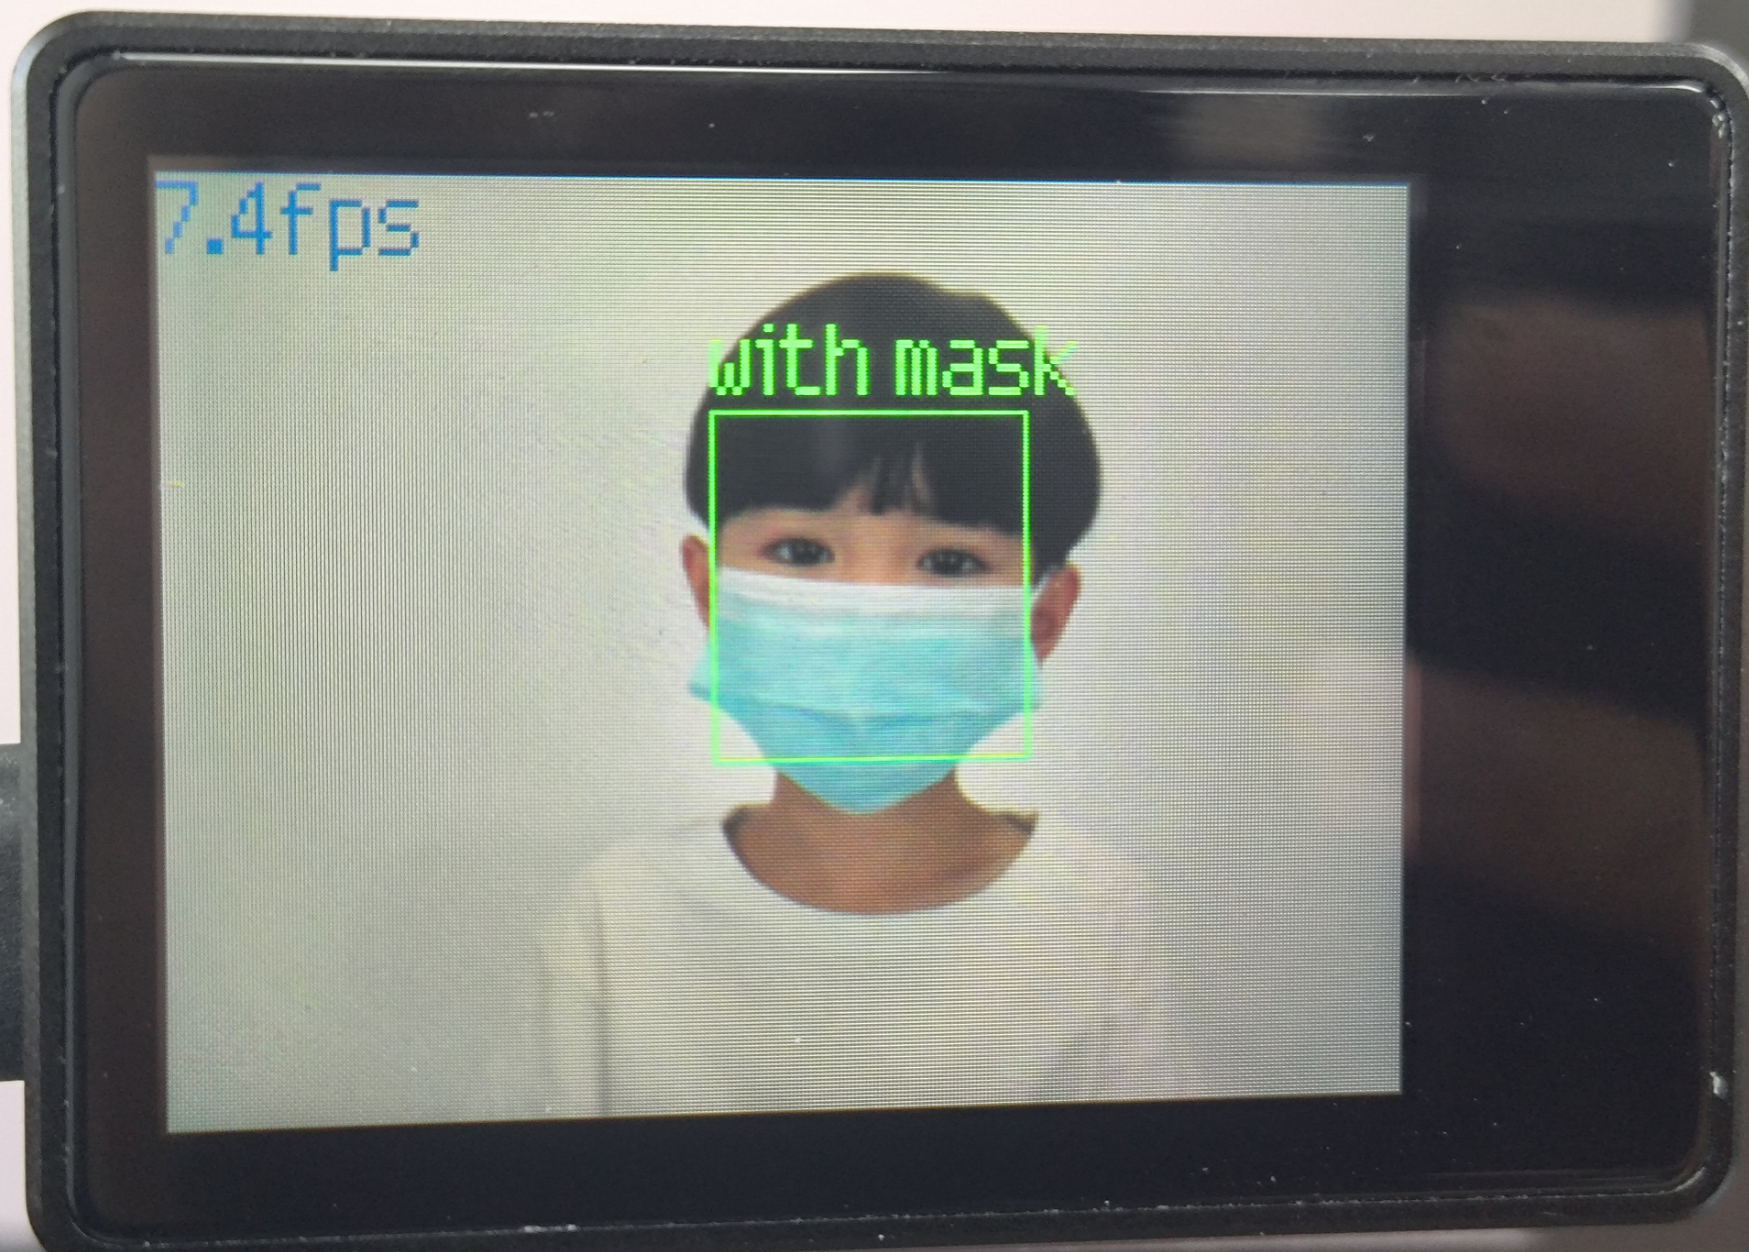
- 当有佩戴口罩时,显示绿色框和"with mask"。
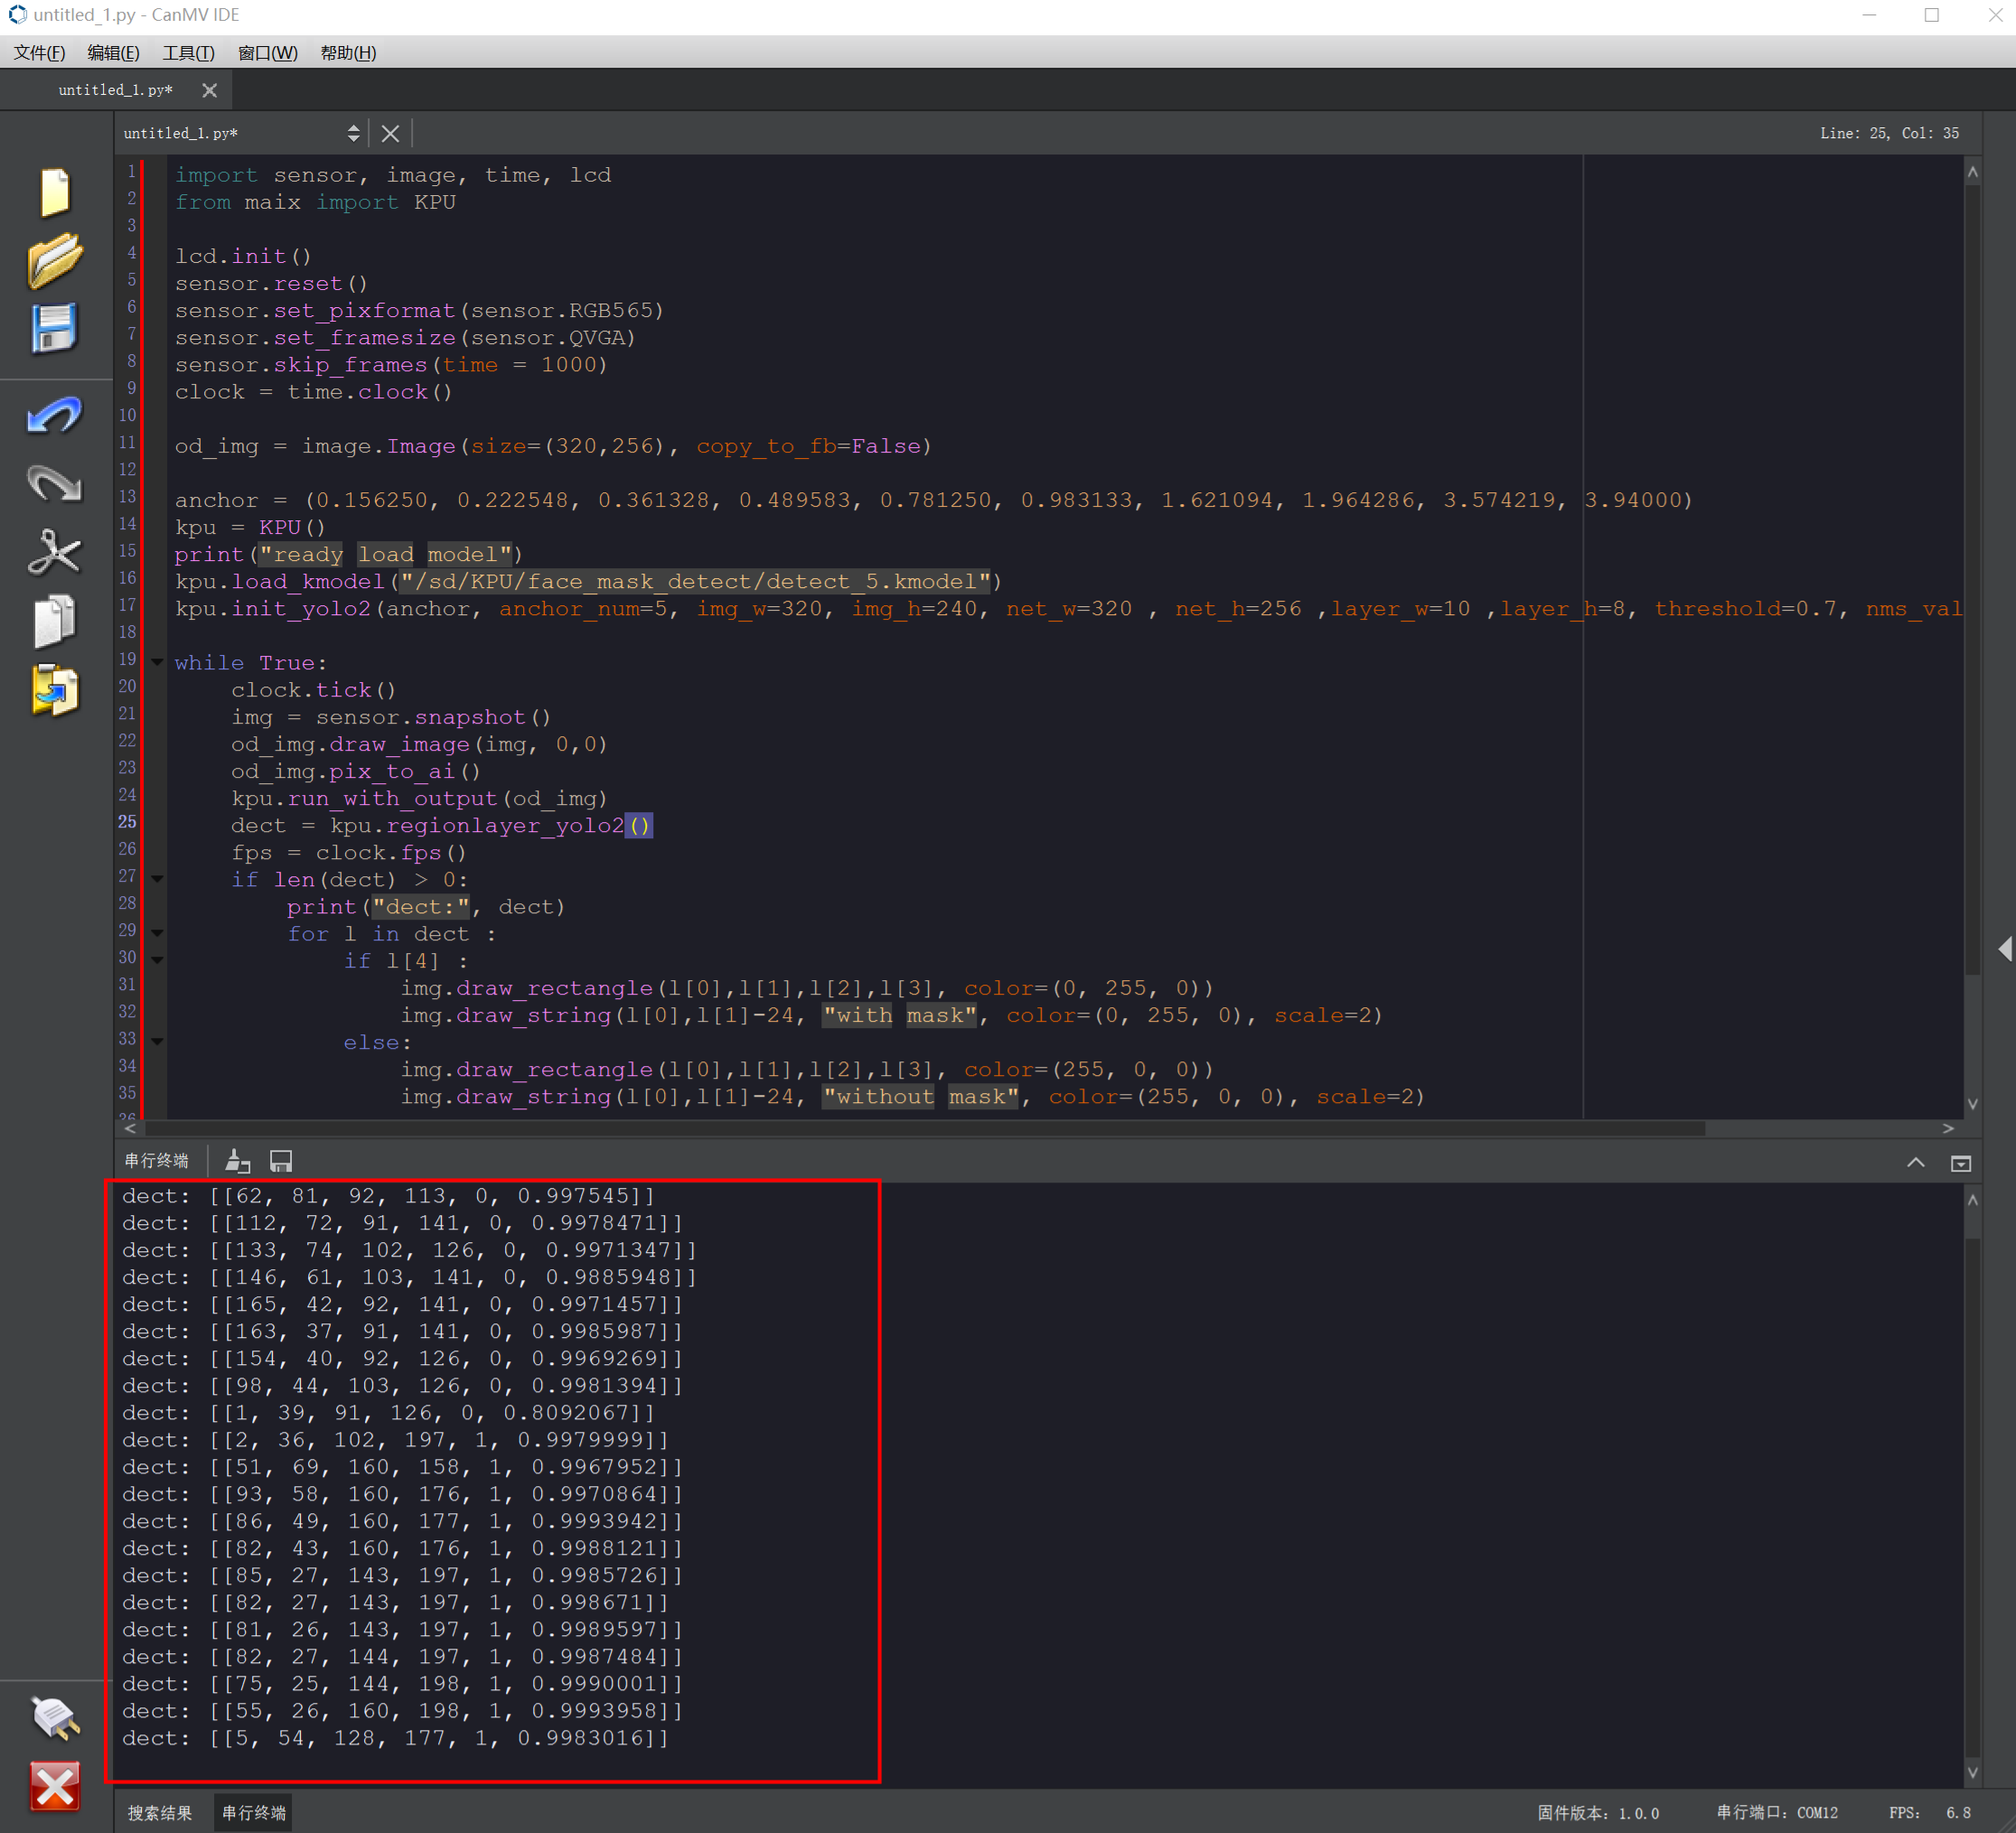
- 同时在IDE底部的串行终端会打印人 脸相关信息。
- 目前口罩检测的阈值为threshold=0.7,如果需要检测人脸更加准确,可以适当调整阈值。
例程代码讲解
- 导入相关库,并初始化摄像头和LCD显示屏。
import sensor, image, time, lcd from maix import KPU

lcd.init()
sensor.reset()
sensor.set_pixformat(sensor.RGB565)
sensor.set_framesize(sensor.QVGA)
sensor.skip_frames(time = 1000)
clock = time.clock()- 初始化KPU相关的参数, kpu需要加载kmodel文件,本次实验需要的模型文件路径为:/sd/KPU/face_mask_detect/detect_5.kmodel,并使用yolo2来计算是否符合模型要求。 od_img为神经网络的图像,尺寸为320*256,用于后续储存摄像头图像并传入KPU计算。
od_img = image.Image(size=(320,256), copy_to_fb=False)
anchor = (0.156250, 0.222548, 0.361328, 0.489583, 0.781250, 0.983133, 1.621094,
1.964286, 3.574219, 3.94000)
kpu = KPU()
print("ready load model")
kpu.load_kmodel("/sd/KPU/face_mask_detect/detect_5.kmodel")
kpu.init_yolo2(anchor, anchor_num=5, img_w=320, img_h=240, net_w=320 , net_h=256
,layer_w=10 ,layer_h=8, threshold=0.7, nms_value=0.4, classes=2)- 新建while循环,将图像传入KPU进行计算,使用yolo2神经网络算法进行解算,如果是佩戴了扣上口罩的人脸,用绿色框出并显示"with mask",如果是未佩戴口罩的人脸,则用红色框出并显示"without mask"。
while True:
    clock.tick()
    img = sensor.snapshot()
    od_img.draw_image(img, 0,0)
    od_img.pix_to_ai()
    kpu.run_with_output(od_img)
    dect = kpu.regionlayer_yolo2()
    fps = clock.fps()
    if len(dect) > 0:
        print("dect:", dect)
        for l in dect :
            if l[4] :
                img.draw_rectangle(l[0],l[1],l[2],l[3], color=(0, 255, 0))
                img.draw_string(l[0],l[1]-24, "with mask", color=(0, 255, 0), scale=2)
            else:
                img.draw_rectangle(l[0],l[1],l[2],l[3], color=(255, 0, 0))
                img.draw_string(l[0],l[1]-24, "without mask", color=(255, 0, 0), scale=2)

    img.draw_string(0, 0, "%2.1ffps" %(fps), color=(0, 60, 128), scale=2.0)
    lcd.display(img)

kpu.deinit()