ESP32S31.14寸TFT BMP280
2023年12月13日小于 1 分钟
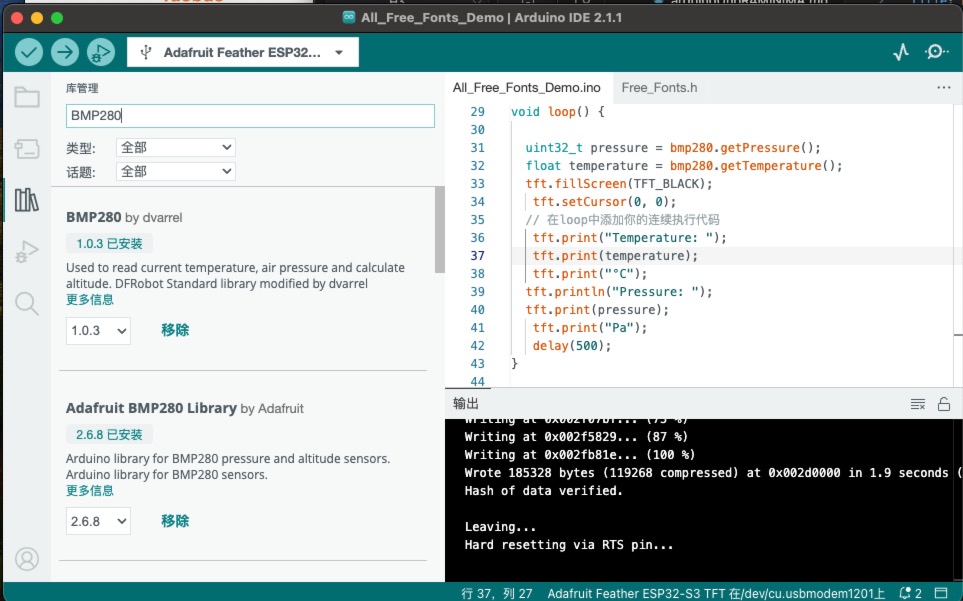
BMP280库安装
BMP20库安装,可以安装 BMP280、Adafruit_BMP280,本教程使用的是第一个BMP280.
串口打印数据
/**************************************************************************
   Tests the getPressure functions
 **************************************************************************/
#include <BMP280.h>
BMP280 bmp280;

void setup()
{
  Serial.begin(115200);
  delay(10);
  Serial.println("BMP280 example");

  Wire.begin(); //Join I2C bus
  bmp280.begin();
}

void loop()
{
  //Get pressure value
  uint32_t pressure = bmp280.getPressure();
  float temperature = bmp280.getTemperature();

  //Print the results
  Serial.print("Temperature: ");
  Serial.print(temperature);
  Serial.print("°C \t");
  Serial.print("Pressure: ");
  Serial.print(pressure);
  Serial.println("Pa");

  delay(2000);
}
TFT显示数据
TFT显示需要先按照 之前的点亮TFT教程,安装TFT库,之后才能显示数据.
#include <TFT_eSPI.h>
TFT_eSPI tft;
#include <BMP280.h>
BMP280 bmp280;
void setup() {
Serial.begin(115200);
Wire.begin(); //Join I2C bus
bmp280.begin();
// 初始化屏幕
tft.begin();
// 设置屏幕旋转方向
tft.setRotation(1);
// 填充屏幕为黑色
tft.fillScreen(TFT_BLACK);
// 设置字体颜色
tft.setTextColor(TFT_WHITE);
// 设置文本大小为2倍
tft.setTextSize(2);
// 在屏幕上显示文本
tft.setCursor(20, 20);
}
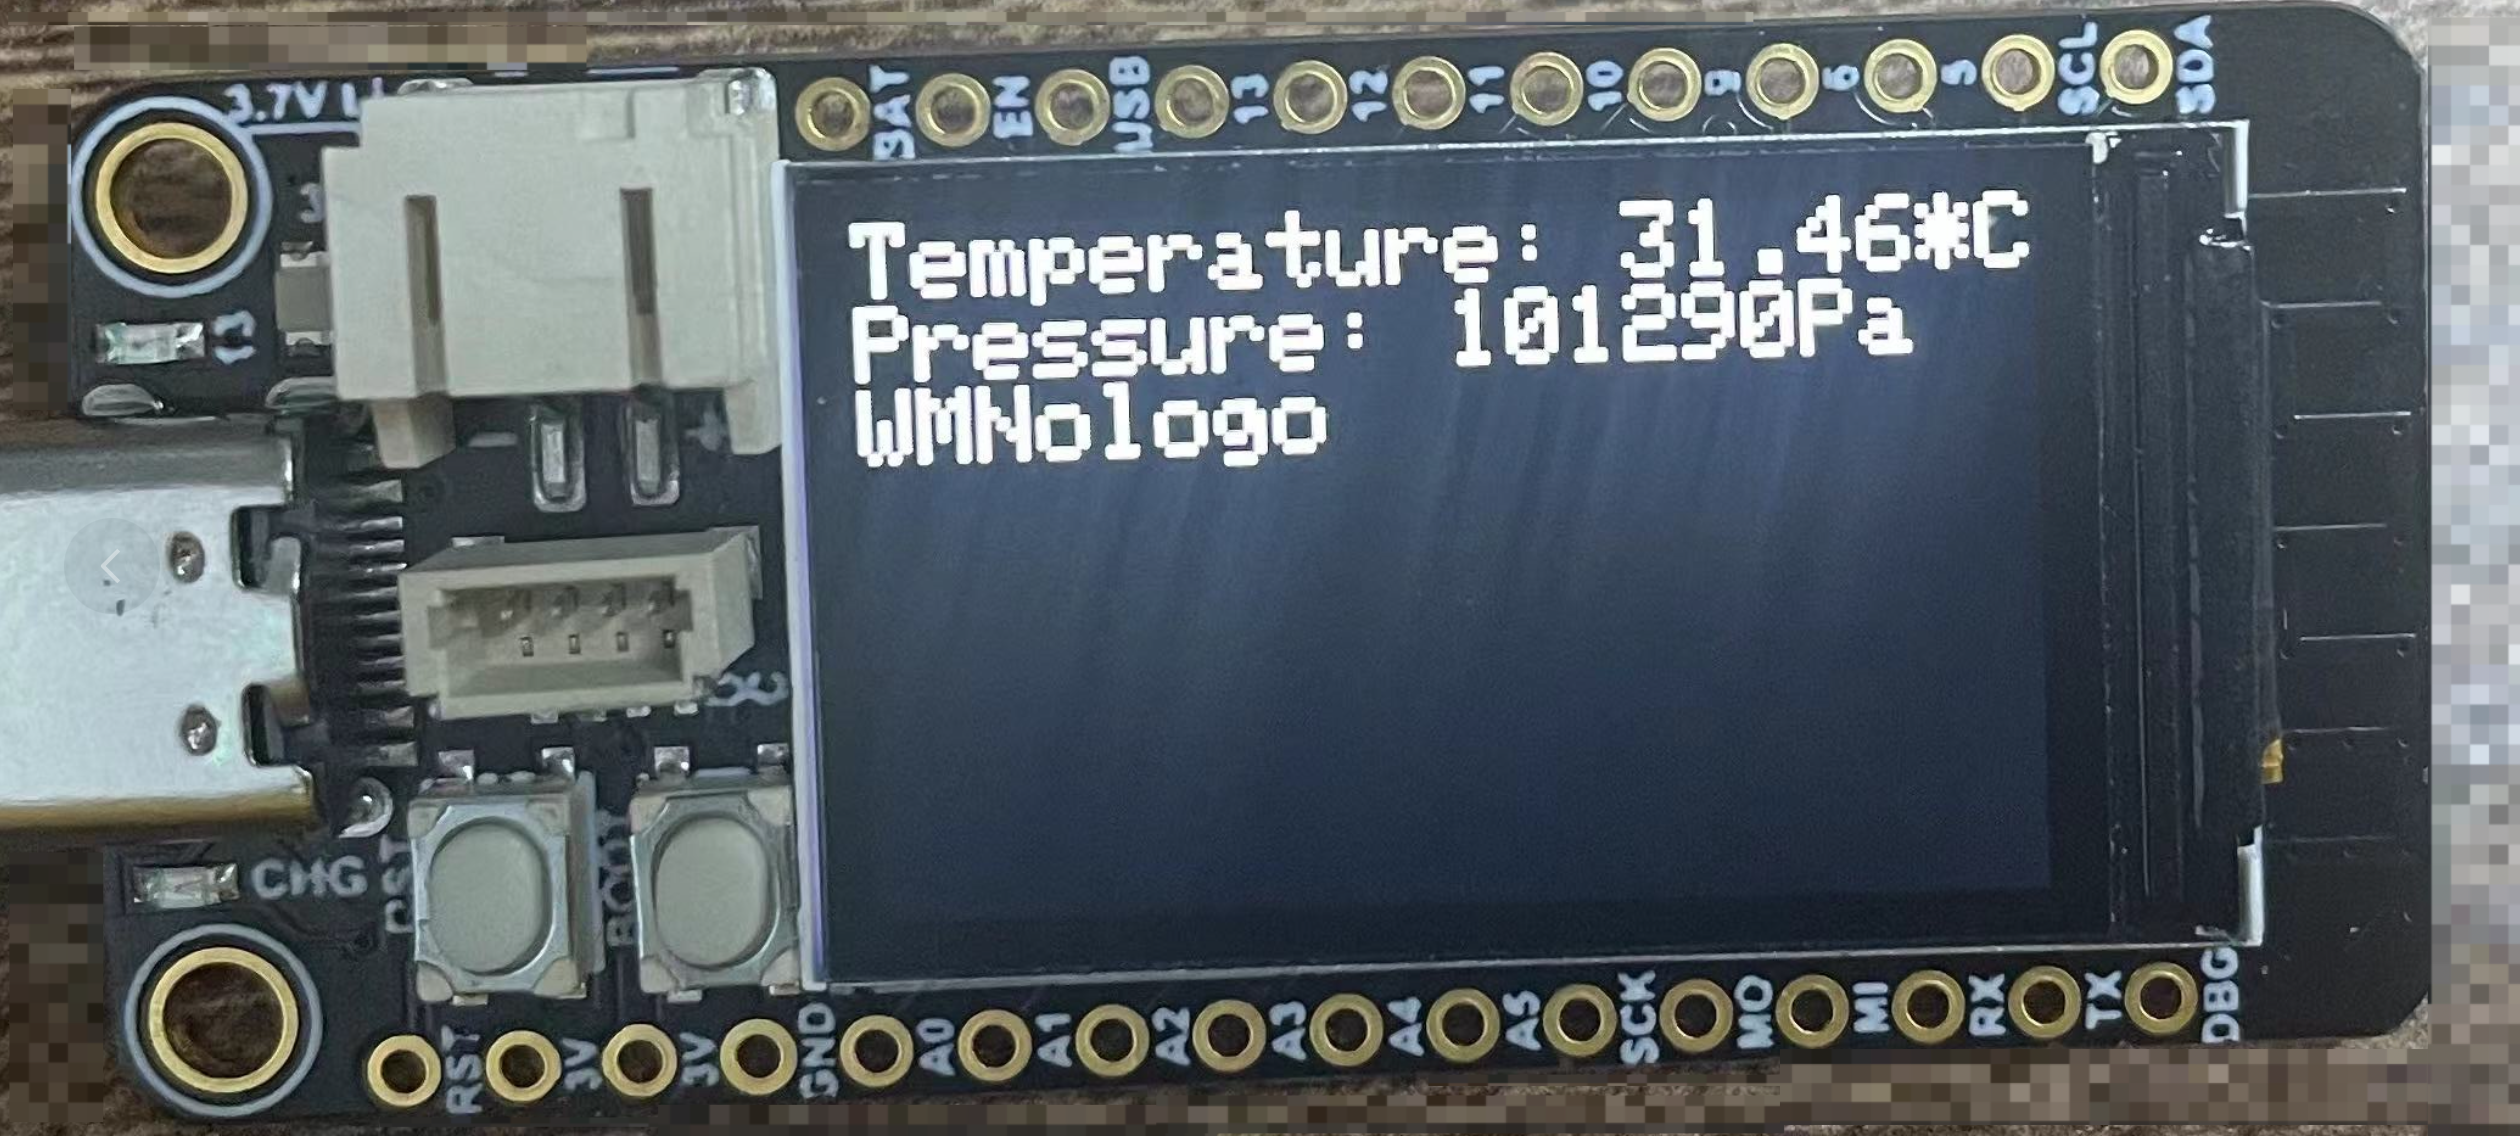
void loop() {
uint32_t pressure = bmp280.getPressure();
float temperature = bmp280.getTemperature();
tft.fillScreen(TFT_BLACK);
tft.setCursor(0, 0);
// 在loop中添加你的连续执行代码
tft.print("Temperature: ");
tft.print(temperature);
tft.print("*C");
tft.print("Pressure: ");
tft.print(pressure);
tft.print("Pa \n");
tft.println("WMNologo");
delay(500);
}会显示如下图所示